Goodbye Pink Tub!
Friday, January 14th, 2005[[This took place in mid-October, but it’s part of my “catching up” on stories about the house that occurred before and after we moved in.]]
The upstairs hall bath doesn’t have an original bit left in it, however, it does have some rather interesting bits. My best guess combined with some best guesses of a few other people would date the bathroom renovation to the 20’s or 30’s, primarily because the bathroom is encased in green Vitrolite from the floor to about two feet from the ceiling.
Vitrolite is a “pigmented structural glass” that is definitely a bit unusual looking:
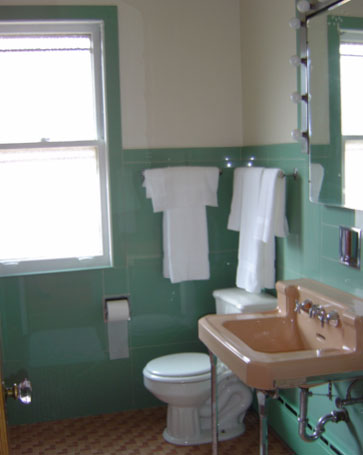
Note that the toilet was probably installed in the last 5 years, and the sink seems to have been replaced in the 50’s, and the tile work hails from who-knows when. The tub is a great old cast iron built-in tub, except for one tiny detail. It’s pink:
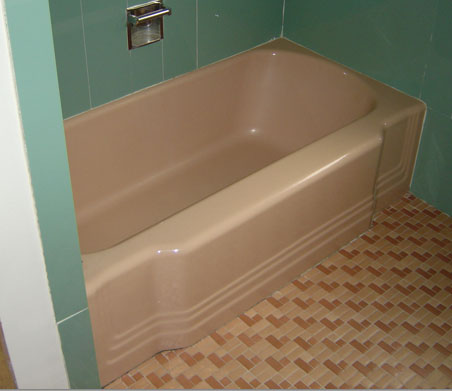
While we decided that we could wait to replace the toilet and the sink (and eventually, the tile), we wanted to do something about the color of the tub ASAP. Ripping the tub out would have been a gargantuan task, not to mention the fact that it would have required destroying much of the Vitrolite, so we decided to get the tub “re-enameled” white.
The re-enameling process (actually, it’s not enamel at all, but an epoxy) is not only much cheaper than replacing the tub, but can be done by a professional in under half a day. The Tub Guy came out with a roll of tape and a roll of paper and he taped and papered the entire bathroom and most of the hallway to boot. After removing the tub fixtures and taping cups to the faucet and shower head (to catch any drips), he washed the whole tub down with an acid to etch the surface so that the epoxy would bond with it better. Then he sprayed on the epoxy:

He finished his work, cleaned every last bit of mess up, and was gone in about 2 hours. He instructed me not to use the tub until I caulked around it with a good quality silicone caulk, and that I should wait a few days to do the caulking. Since I was so busy with other things, I didn’t get around to caulking the tub until November.
I had heard horror stories about working with silicone caulk–that it was messy and extremely difficult to work with, so I was somewhat reticent to do this job (all of the caulking I’d done in the past was with latex-based caulk, and that cleans up with nothing but water). So after a bit of research, I got my supplies together:
- 1 Caulk gun
- 1 Tube of GE Silicone II caulk
- 1 Roll of blue masking tape
- 1 latex rubber surgical glove (Super-handy to have around–buy them by the bag!)
- 1 Roll of paper towel.
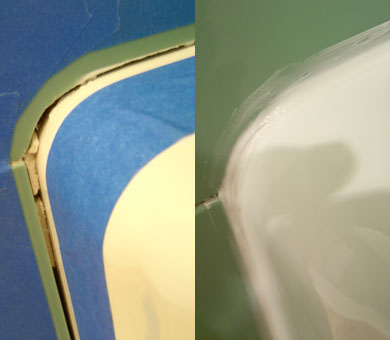
I masked off the border of the tub with the blue tape, put the glove on, then caulked each piece of the tub and smoothed the bead with my gloved hand, wiping any excess or mess on a piece of paper towel. After I got all the caulk on and smoothed, I carefully pulled all the tape off, and, holding all the tape and dirty paper towels in my gloved hand, I took the glove off, turning it inside-out so that it encapsulated the tape and paper towel–voila, instant packaged trash. Turns out that it was piece of cake.
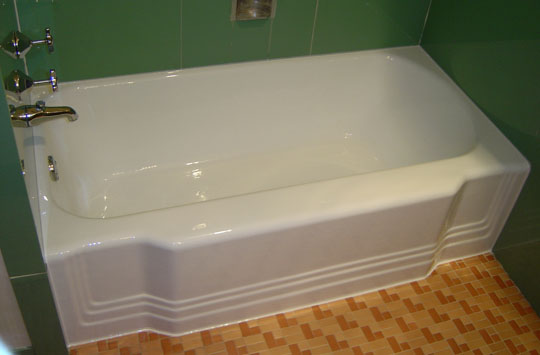
Here’s the before and after shots of the caulking job:
And, finally the finished product: